

Making your own soy wax candles is a rewarding, creative, and eco‑friendly hobby (or side business). Not only do you get to customize scent, color and container, but soy wax burns cleaner and longer than conventional paraffin.
In this step‑by‑step guide, you’ll learn how to make soy wax candles at home from gathering materials to curing the finished candle. We also draw on expert advice and Craftiviti’s techniques to ensure your first candle turns out great.

Why Choose Soy Wax for Candle Making?
* Clean burning & low soot. Soy wax is plant‑based and produces less soot than paraffin.
* Sustainable & renewable. Derived from soybean oil, soy is a greener wax choice.
* Better scent throw (hot & cold). Properly cured soy candles can carry fragrance well.
* Easy to work with. As Craftiviti notes, their “Perfect Pour Soy Wax USA” is beginner‑friendly and ideal for container candles.
* Customizable. You can mix in additives or blend with harder waxes for different effects.
However, pure soy wax can sometimes exhibit mottling (lumpy tops) or shrinkage. Craftiviti’s candle additive is recommended to stabilize the wax, reduce surface imperfections, and improve fragrance retention.
What You’ll Need (Materials & Tools)
| Item | Purpose / Notes |
|---|---|
| Soy wax (pellets or flakes) | The core wax. For example, Craftiviti’s Perfect Pour Soy Wax is popular for containers. |
| Candle additive (optional) | Helps reduce mottling, improve firmness, and boost scent throw. |
| Wick(s) | Choose a wick suitable for soy and for your container size (e.g. ECO, HTP) |
| Container / jar | Glass jars are safest (avoid plastic) |
| Glue dot or adhesive | To secure the wick base to the jar bottom |
| Wick centering tool | A stick, pencil, bow‑tie clip, or wick holder to keep the wick centered |
| Thermometer | To monitor wax temperature accurately |
| Double boiler or melting pot | For gently melting the wax |
| Stirrer | A wooden or metal stir stick |
| Fragrance oil / essential oil | Typically 8%–10% of the wax weight is a good starting point |
| Colorant / dye (optional) | Must be wax‑safe, non bleeding |
| Pouring pitcher | Heat‑resistant container for pouring |
| Labels / decorations (optional) | For branding, gifting, or presentation |
Step‑by‑Step: How to Make Soy Wax Candles
Step 1: Prepare Your Workspace
Set up in a well‑ventilated area. Cover your working surface with newspaper or craft paper in case of drips. Keep children, pets, or flammable items well away.
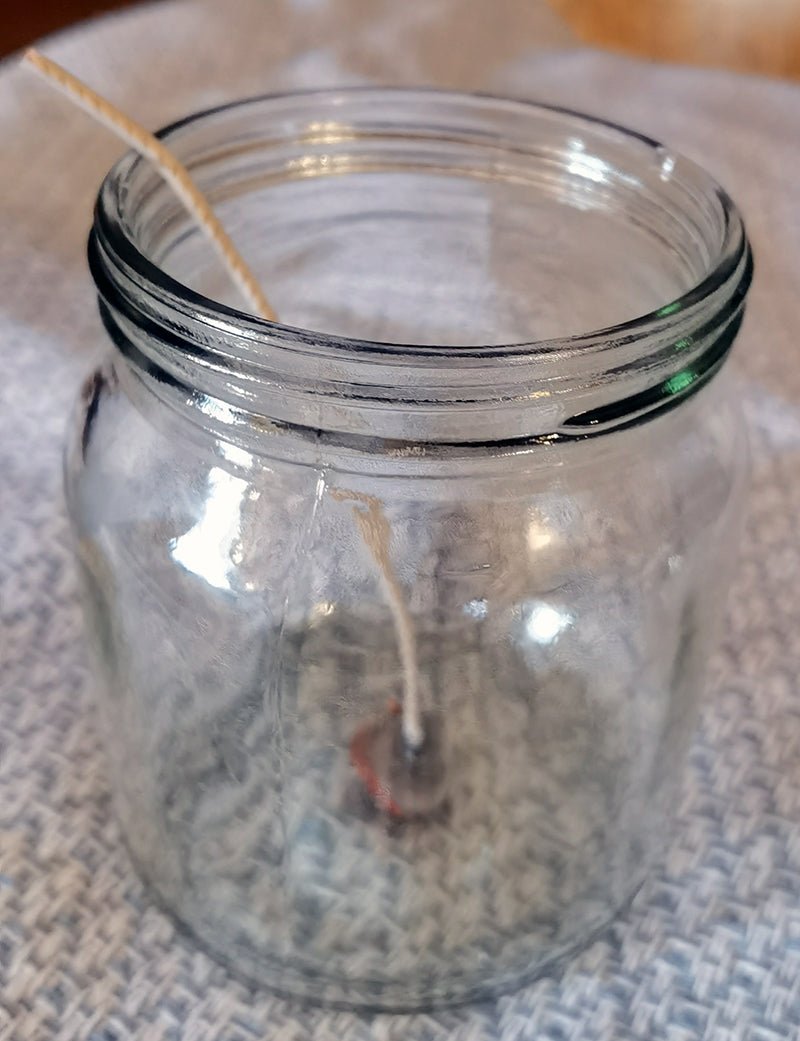
Step 2: Fix the Wick
1. Place a glue dot or small amount of adhesive at the bottom of your jar.
2. Stick the wick’s metal tab firmly to the center bottom of the jar.
3. Use a wick centering tool (e.g. clip, chopstick, bow tie clip) to hold the wick straight and centered throughout the process.
A misaligned wick often leads to uneven burning or tunneling.
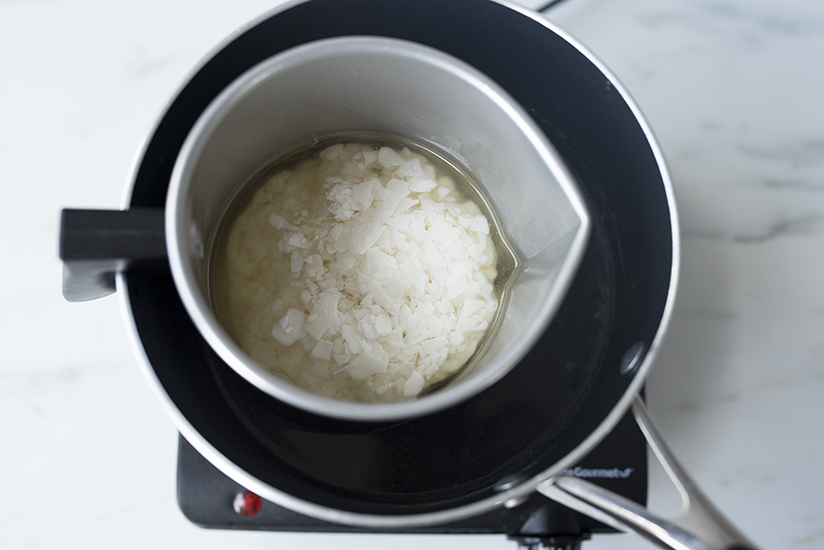
Step 3: Melt the Soy Wax
Using a double boiler is the safest method: fill a pot with water and set a smaller container with wax above it. Heat gently, stirring occasionally, until fully melted and smooth.
Avoid overheating. Many soy waxes melt around 70 °C (158 °F). Once fully melted, remove from heat.
If using Craftiviti’s Perfect Pour Soy Wax, it’s marketed as a “one‑pour” wax with zero cooling time and no need to monitor temperature too stringently.

Step 4: Add Fragrance & Color
* Let the wax cool slightly (for example, toward 60 °C or cooler) before adding fragrance, to avoid evaporating the scent.
* Use 8% fragrance load (weight of fragrance oil = 8% of wax weight) as a general guideline. You can adjust per your scent’s strength.
* Stir gently but thoroughly for 1–2 minutes to distribute scent evenly.
* If you’re using colorants or dyes, add them at this stage (ensure they are candle‑safe and don’t bleed).
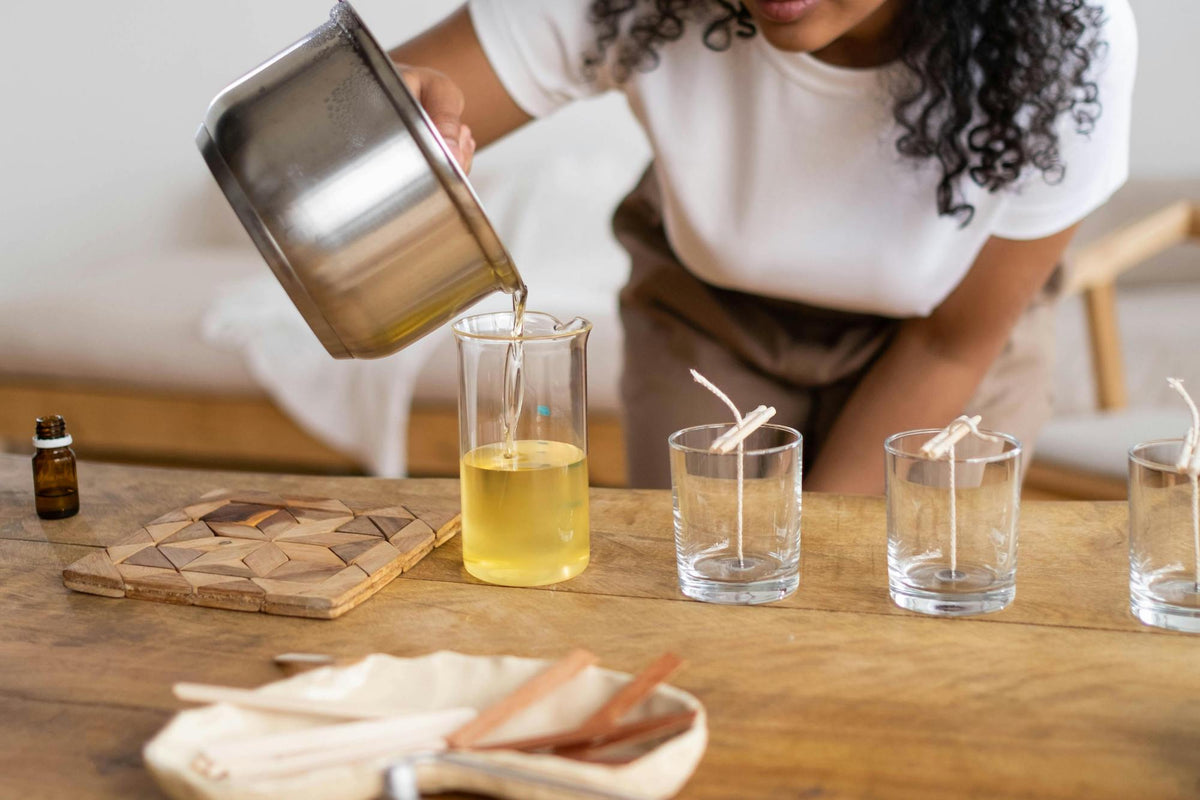
Step 5: Pouring the Wax
* Pour the scented wax into your prepared container slowly, trying not to disturb the wick.
* Leave a small gap (say 5–10 mm) from the rim to prevent spill and allow for flame control.
* If any wick shifts, gently reposition while the wax is still fluid.
Step 6: Initial Cooling & Topping Up
* Let the jar sit undisturbed as it cools. Avoid moving or jostling it.
* For pure soy wax, shrinkage or surface dips may appear. You can correct this by a top‑up pour once the wax surface cools but is still soft.
* If you’re using Craftiviti’s additive or wax blends, these help minimize shrinkage and mottling.
Step 7: Curing the Candle
* Allow the candle to cure for at least 24–48 hours, though many crafters recommend 7 days for optimal scent throw and wax bonding.
* During curing, avoid drastic temperature changes.

Step 8: Trim the Wick & Perform Test Burn
* Trim the wick to about 5 mm (¼ inch) before lighting for the first time.
* On the first burn, allow the wax to melt all the way to the jar edges—to avoid tunneling and promote even burn.
* Burn in safe conditions, never unattended.
Common Issues & Tips (Troubleshooting)
| Problem | Possible Cause | Solution / Tip |
|---|---|---|
| Uneven burn / tunneling | Wick too small, off‑center | Use a larger wick, center it properly |
| Mottling / surface cracks | Rapid cooling, pure soy shrinkage | Use candle additive, or top‑up pour |
| Weak fragrance | Low fragrance load, incorrect pour temp | Increase to ~8–10%, pour at correct temp |
| Wick drowning / poor flame | Wick too small for container | Use heavier wick or dual wicks |
| Wax bubbling | Too much heat or trapped air | Pour slowly, tap lightly after pouring, don’t overheat |
In the community, one commenter shared:
“I heat the soy wax up to 180 °F and then I add the oil… whenever I came back the next day the surface had bubbles.”
This suggests temperature handling and degassing (tapping the jar) are critical steps.
Advanced Tips & Variations

* Wax blends. Mix soy with coconut wax, beeswax or harder wax for pillars or unique textures.

* Wooden wicks. Use crackling wood wicks for ambiance; ensure correct sizing and alignment.

* Molds. Use silicone, aluminium or acrylic molds for free‑standing candles. Use release agent beforehand.
* Layering & embeds. You can pour layered colors or embed botanicals, crystals, or decorative pieces.

* Workshops & kits. Craftiviti offers candle making workshops and kits (e.g. the “Crafti‑Kit”) that package everything you need and provide video demos.
Craftiviti’s candle making kits (e.g. the Mini Crafti‑Kit – Soy Wax Candle Making Kit) include soy wax, fragrance oil, jars, wicks, gloves, and recipe cards. It helps beginners skip the guesswork.
Get your Soy Wax Candle Making Kit here or visit our retail store at Craftiviti, Level 2, Centrepoint Bandar Utama.
With patience, care, and the right technique, you can make beautiful, fragrant soy wax candles right at home. Use Craftiviti’s teachings (kits, additives, recommended practices) as your guide, but don’t be afraid to experiment with scent blends, container styles, or decorative touches. The more you practice, the more consistent your results will become.